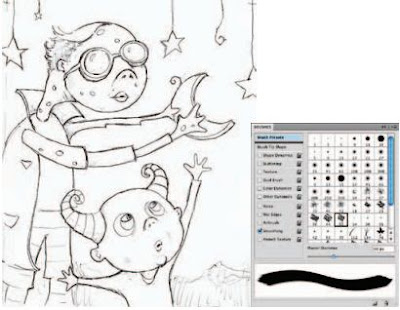
 1.Open up the sketch.jpg file. Starting with a sketch is an essential part of the process when painting in the tactile realm, and working in Photoshop is no exception. The main difference here is that in this case the sketch is scanned rather than being drawn directly onto the canvas. Once you’ve opened up the sketch, select the Brush tool. In the Brushes palette, enable the Smoothing option at the left. We’re going to work with this option enabled for the entire chapter because smoothing guarantees that your brush strokes contain nice, smooth curves. And that is an essential quality when you want your painting to look convincing.
 Default brushes
Although Photoshop is equipped with a plethora of excellent brush libraries, we’re going to focus on some simple default brushes capable of producing exceptional results.
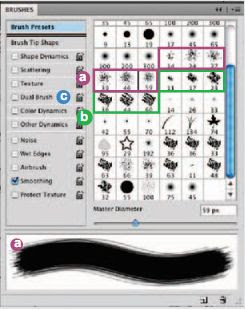 a. The spatter brushes may not look like much within a vast list of presets,but these simple clusters of spots are very useful. There are a number of different tips and sizes to choose from. Regardless of which option you go with, any spatter brush gives the effect of using a brush with some stray dry bristles sticking out around the edges. Painting over the top of the colored regions of the canvas with a spatter brush allows you to create a bristled, tactile effect.
 b. The chalk brushes are denser than the spatter brushes but equally as useful. Strokes created with chalk brushes do not have any stray bristles sticking out the sides, but they do provide a nice rough effect at the beginning and at the ending of each stroke. They are ideal for establishing basic, yet convincing, colored regions within your painting.
c. The Dual Brush option is an excellent tool that allows you to combine two different brushes within a single tip. Why do we point out this single feature amid a sea of others? Well, using the Dual Brush option allows you to quickly and easily combine two brush tips to create a new one. We’ll explore this feature in detail using custom brush tips later in the chapter.
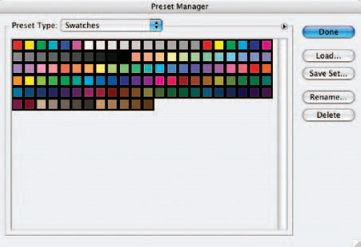
2 Now, the next thing we’re going to do is establish the Swatches palette as our paint palette and fill it with our own set of colors unique to this painting. By doing this, we can return to the Swatches palette and select one of our custom colors at any point later on. Choose Edit Preset Manager from the menu. Choose Swatches from the Preset Type menu. The Preset Manager can also be accessed via the Swatches Palette menu. If you access it via the Swatches Palette menu, the Preset Type is automatically set to Swatches. When the swatches appear, click on the first swatch and then Shift-click on the last swatch. This will target all of the swatches. When all of the swatches are targeted, click on the Delete button. After they’re all deleted, click on the Done button to exit the Preset Manager, and you’ll notice that the Swatches palette has been emptied.
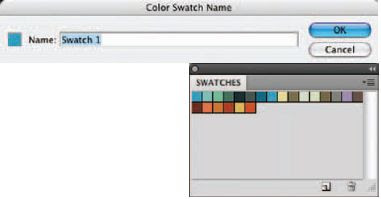 3 When the Swatches palette is empty, click on the Foreground Color swatch in the toolbox to access the picker. Select a new foreground color from the picker and click OK. Move the mouse over the empty area of the Swatches palette. You’ll see it temporarily switch to a paint bucket. When you see the paint bucket, click to add the new color to the Swatches palette. Name your new swatch when prompted and then click OK. After naming, the new color is added to the Swatches palette. Use this method to add a variety of colors to the Swatches palette. This method is an excellent way to exercise a little forethought, establishing a predefined color scheme to work within before you begin painting.
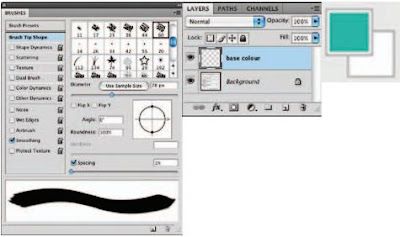
4 After selecting the Brush tool, choose the largest Chalk Brush preset from the Brushes
palette. In the Brush Tip Shape section of the Brushes palette, increase the diameter of the brush. You want a large brush here because, first, we want to cover most of the background with color, giving us a new base color other than white. Leave the spacing option enabled but reduce the amount to 1 so that there is no stepping or spaced brush marks present within your strokes. Choose a foreground color from the Swatches palette and click the Create a New Layer button in the Layers palette.
No comments:
Post a Comment